
When you purchase through links on our site, we may earn an affiliate commission at no extra cost to you.
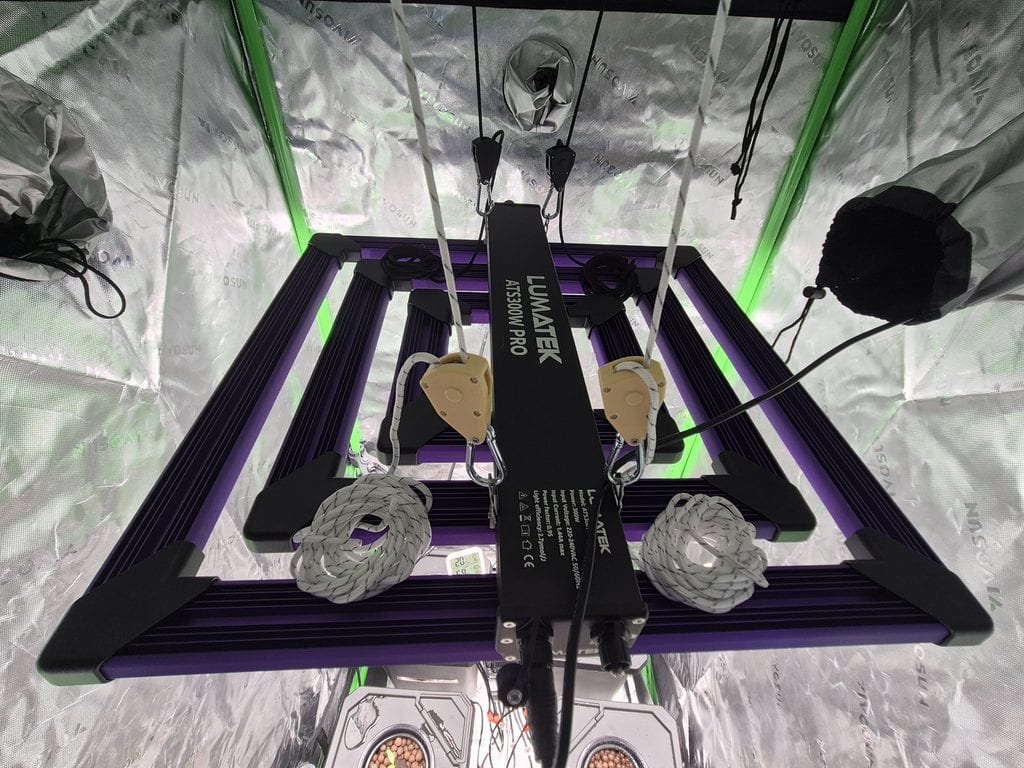
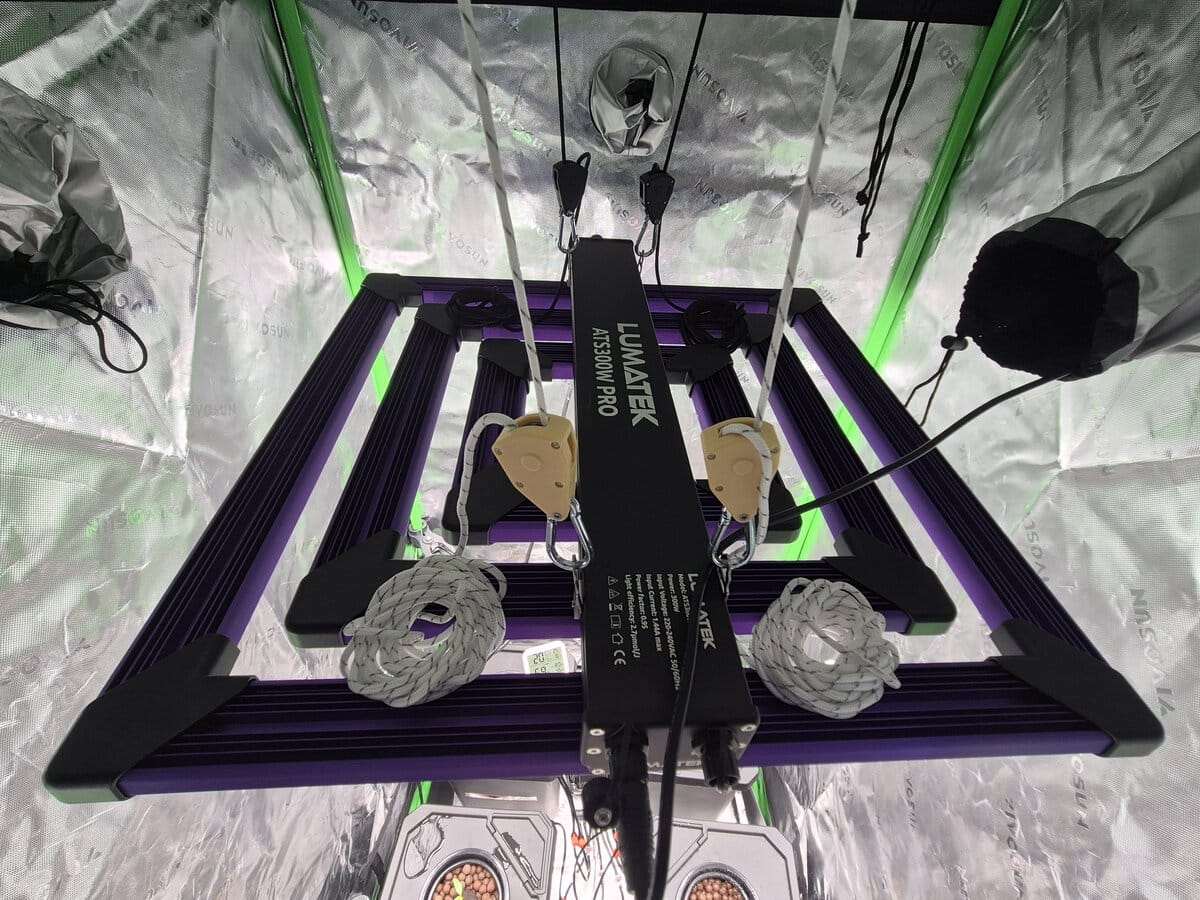
I’ve recently added the Lumatek ATS 300W PRO to my indoor growing setup, where I’m using it to grow vegetables in a four-bucket hydroponic system. Having tested several other LED grow lights, I was interested to see how Lumatek’s 300W bar-style fixture compares, particularly in terms of build quality, cooling, light coverage and running costs.
I’m testing the light in a 90 × 90cm VIVOSUN grow tent, and in this review I’ll share my real-world electricity measurements, what I’ve liked and disliked about using it, and how it performs as my vegetable-growing trial progresses.
Lumatek ATS 300W PRO Review Summary
Initial hands-on reviewMy initial impressions of the Lumatek ATS 300W PRO are excellent. The substantial aluminium bar construction feels well made, the light is completely silent in operation, and its open design allows air to circulate naturally between the LED bars.
What has impressed me most is how cool the LED bars remain. Even after several hours of operation, I’ve been able to switch the light off and touch the bars without finding them uncomfortably hot. The 25%, 50%, 75% and 100% settings provide useful flexibility, and my electricity measurements at 50% and 75% closely match the expected power consumption.
What I Like
- Substantial, well-made aluminium bar construction
- Effective passive cooling in my testing
- Completely silent, fanless operation
- Four power settings with predictable electricity consumption
- Wide LED arrangement suited to a 90 × 90cm grow tent
- Supports compatible external controllers and multi-light control
What I’d Improve
- I’d prefer the dimmer integrated into the fixture rather than connected by a separate cable, although the external arrangement has its advantages
A note on the dimmer: I’ve routed the separate dimmer cable through a ventilation opening in my grow tent, allowing me to adjust the brightness without opening it. Although I’d normally prefer an integrated control, this arrangement has proved surprisingly convenient.
Ongoing growing trial: My plants are still young, so this initial review focuses on build quality, installation, cooling, dimming and electricity consumption. I’ll update my assessment as the plants mature and begin producing crops.
Not sure if this is the right grow light for you? Take a look at my Best LED Grow Lights UK guide, where I compare other LED grow lights at different wattages and price points to help you find the best option for your growing space.
My Complete Indoor Growing Setup
This is my own indoor hydroponic growing setup, which I’ve put together around the Lumatek ATS 300W PRO grow light. I’m using it with a VIVOSUN grow tent and Spider Farmer four-bucket DWC system to grow tomatoes, chillies, peppers and dwarf beans. Below are the actual products I’m using in my setup, with my hands-on experience of how they work together.

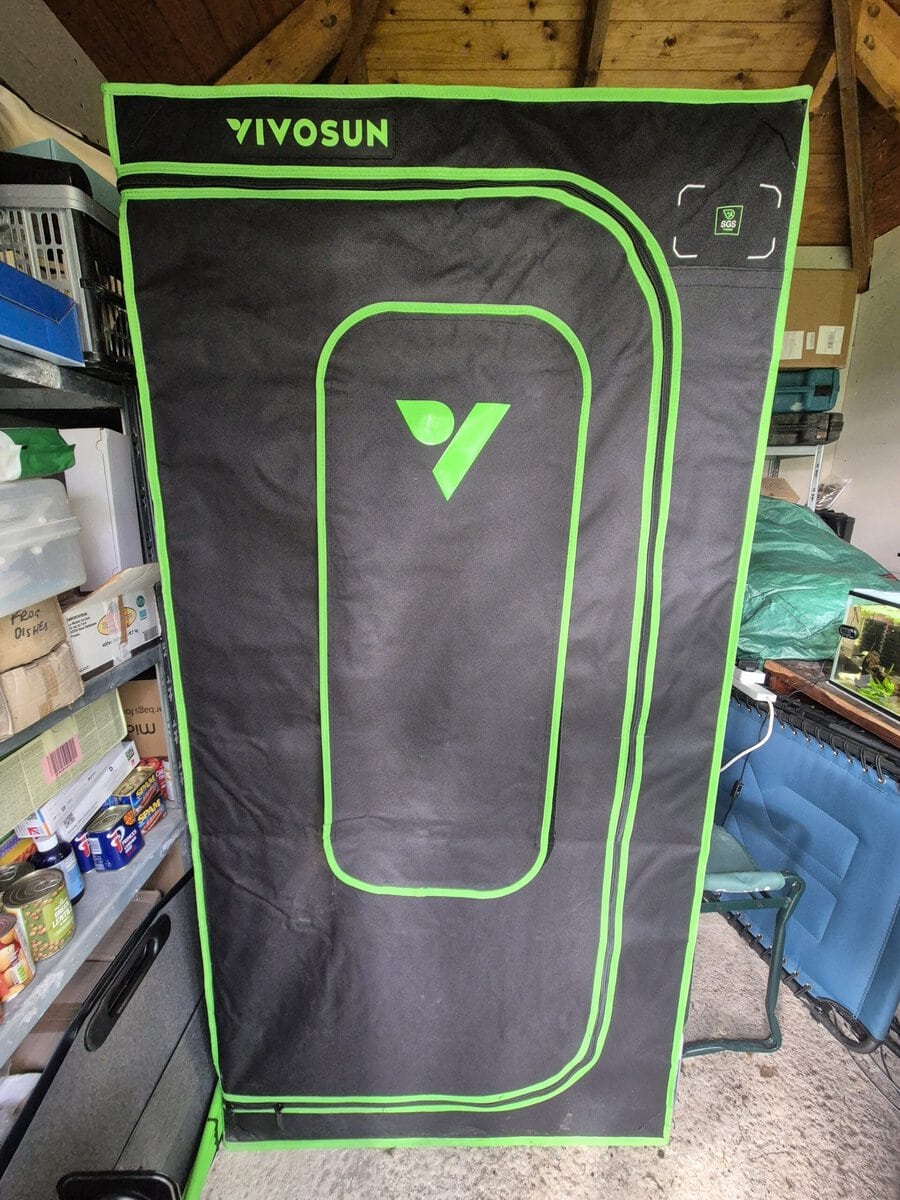
VIVOSUN Grow Tent
My VIVOSUN grow tent houses the Lumatek ATS 300W PRO and four Spider Farmer hydroponic buckets. The reflective interior helps distribute light, while the ventilation openings allow me to route cables and the dimmer control outside the tent.
The Amazon link is for a similar VIVOSUN 2000D model measuring 120 × 60 × 180cm, rather than my exact size.
Check Amazon Price →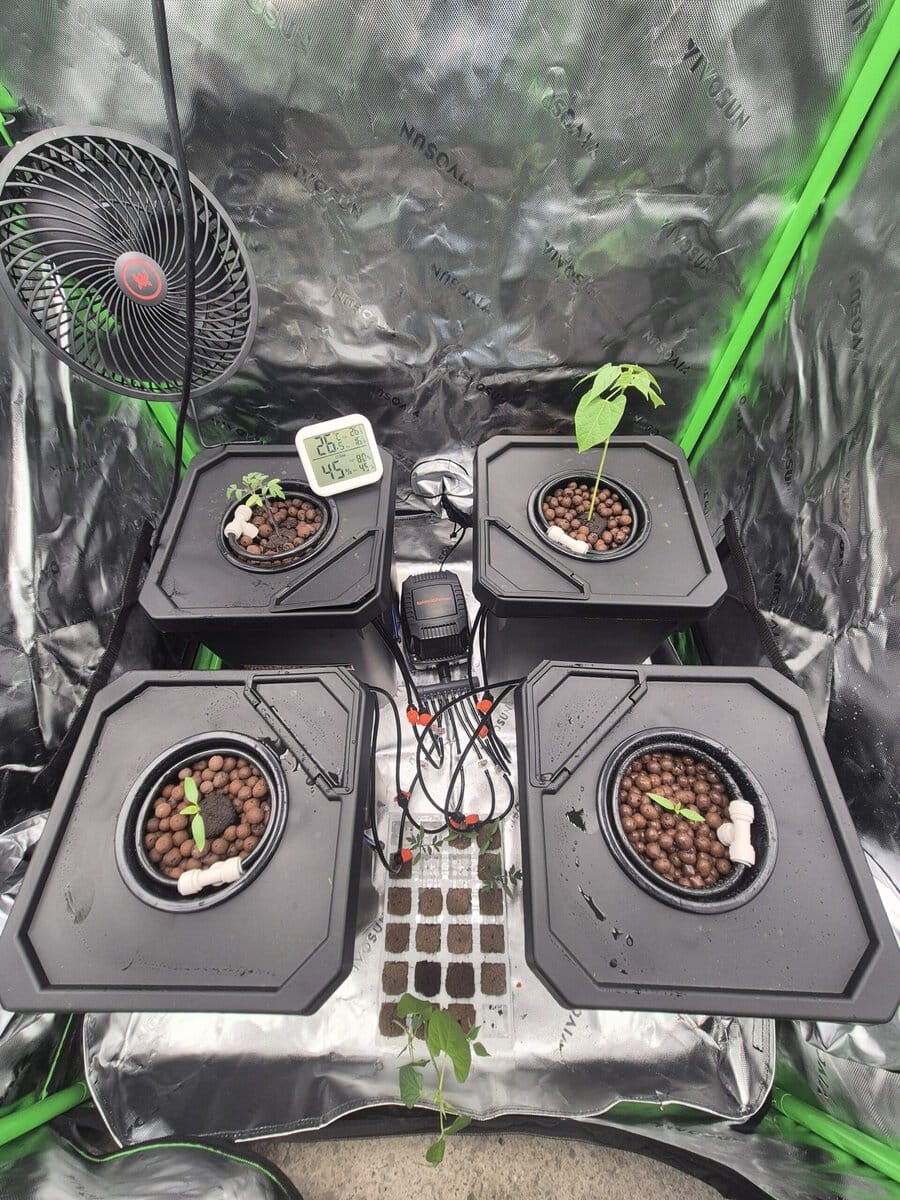
Spider Farmer 4-Bucket DWC System
I’m using this four-bucket deep water culture system to grow tomatoes, chillies, peppers and dwarf beans beneath the Lumatek light. The system uses air stones to oxygenate the nutrient solution and irrigation rings to deliver water to the growing baskets.
My growing trial is ongoing, and I’m still experimenting with irrigation settings and nutrient delivery.
Check Amazon Price →Lumatek ATS 300W PRO Installation and Setup
Setting up the Lumatek ATS 300W PRO is refreshingly straightforward. The LED bars and driver are already assembled, so there’s no complicated construction or wiring involved. Once the light is suspended securely, you simply connect the separate dimmer and power cable.
Hanging the Light
I’m using the Lumatek inside my 90 × 90 × 180cm VIVOSUN grow tent, which makes installation particularly easy. The tent’s overhead support bars provide somewhere to suspend the light, while adjustable ratchet hangers make it simple to raise or lower the fixture as the plants grow.
The Lumatek is supplied with metal suspension wires, but I’d recommend using adjustable ratchet hangers as well. These are inexpensive and much more convenient than repeatedly adjusting fixed hanging cables.
If you’re not using a grow tent, you’ll need a suitable overhead support. A sturdy, appropriately load-rated clothes rail or purpose-built growing frame could work, provided it is stable and securely supports the light. The important thing is to keep the fixture level, safely suspended and clear of anything flammable.
Connecting the Dimmer
Unlike some LED grow lights with a dimmer built directly into the fixture, the Lumatek uses a separate wired controller. This connects to the SIG IN socket on the driver using a locking connector.
I initially thought an integrated dimmer would be neater, but the separate arrangement has proved surprisingly convenient. I’ve routed the dimmer cable through a ventilation opening in my VIVOSUN tent, allowing me to adjust the brightness from outside without opening the tent or disturbing the growing environment.
The manual dimmer provides 0%, 25%, 50%, 75% and 100% settings. I’ve checked the electricity consumption with my energy monitor and found the power settings reasonably accurate. This allows me to reduce output while my plants are young and increase it as they develop.
Can You Daisy-Chain Lumatek ATS 300W PRO Lights?
Yes. The Lumatek ATS 300W PRO supports daisy-chain control, allowing several compatible lights to be adjusted together using an external 0–10V lighting controller.
The controller connects to the SIG IN port on the first light. A separate daisy-chain signal cable then connects that light’s SIG OUT port to the SIG IN port on the next fixture. The process can be repeated for additional compatible lights.
Lumatek documents support for up to 100 fixtures per compatible controller, with 50 per control zone. The necessary external controller and daisy-chain cables are sold separately. This is different from simply connecting multiple lights to the supplied manual dimmer.
I only have one Lumatek in my setup, so I haven’t personally tested daisy-chain operation. However, it’s a useful feature for anyone planning to expand into a larger growing area.
My Setup Experience
Overall, installation was quick and uncomplicated. The combination of the VIVOSUN tent’s support bars, adjustable hanging straps and external dimmer makes the light easy to position and operate.
There’s very little to assemble, and once everything is connected, the light is ready to use. Just make sure the suspension points can safely support the fixture, keep electrical connections away from water and disconnect the power before changing connections.
Light Distance, Intensity and Coverage
One of the advantages of the Lumatek ATS 300W PRO is that you can adjust the light output to suit different stages of growth. The supplied dimmer offers 25%, 50%, 75% and 100% settings, so there’s no need to run the full 300W when growing seedlings or smaller plants.
How High Should You Hang the Lumatek ATS 300W PRO?
Lumatek recommends positioning the fixture approximately 15–40cm above the plant canopy for optimal performance. However, the ideal distance also depends on the brightness setting and the amount of light your plants need. Young seedlings generally require much less intense light than established fruiting plants.
In my own 90 × 90cm grow tent, I’ve initially kept the light considerably higher while establishing tomatoes, chillies, peppers and dwarf beans. I experimented with the 75% setting before reducing the output to around 50%, as the plants are still small and don’t yet need the full intensity of a 300W fixture.
Recommended Light Intensity for Vegetables
Rather than relying entirely on hanging distance, it’s useful to consider PPFD, which measures the amount of photosynthetically useful light reaching the plants each second. The following are general guideline ranges for growing vegetables indoors, including tomatoes and peppers. The ideal intensity varies according to the crop, growth stage and daily lighting duration.
| Growth Stage | Suggested PPFD |
|---|---|
| Seedlings | 150–350 µmol/m²/s |
| Vegetative growth | 350–550 µmol/m²/s |
| Flowering and fruiting | 650+ µmol/m²/s |
Note: These PPFD ranges are general growing guidelines, not measurements taken from my Lumatek ATS 300W PRO. Actual light intensity depends on the dimmer setting, hanging height and position beneath the fixture. I’ll add my own measurements as the growing trial progresses.
Coverage in My 90 × 90cm Grow Tent
The ATS 300W PRO is designed for a growing area of approximately 100 × 100cm, making it well suited to my slightly smaller VIVOSUN tent. Its multiple LED bars distribute the light across a broad area rather than concentrating it into a narrow central beam.
This arrangement makes sense for my four-bucket hydroponic system, where plants occupy different positions across the tent floor. However, I haven’t yet measured PPFD at each bucket, so I can’t claim perfectly even coverage.
As my vegetables mature, I’ll adjust the height and intensity according to their growth and eventually assess how well the light performs during flowering and fruit production.
Build Quality, Heat Management and Noise
The Lumatek ATS 300W PRO feels like a well-built, substantial piece of equipment. Its aluminium frame is solid, with the LEDs distributed across several separate bars rather than concentrated on a single flat panel. The driver is mounted above the light, giving the whole fixture a neat, relatively open design.
I particularly like the bar arrangement. As well as spreading light across the growing area, the gaps between the bars allow air to circulate naturally, helping the aluminium dissipate heat without needing cooling fans.
How Hot Does the Lumatek ATS 300W PRO Get?
One of the most impressive things I’ve noticed during my hands-on testing is how cool the LED bars remain after several hours of operation. When I’ve switched the light off, I’ve been able to touch the bars immediately without finding them uncomfortably hot.
This has been particularly noticeable at reduced power settings. I’ve previously used more conventional LED grow lights, and the Lumatek’s open aluminium bar design seems effective at spreading and dissipating heat.
Of course, a cool-running fixture doesn’t mean it produces no heat. Almost all the electricity consumed by an LED grow light eventually contributes heat to the growing environment. The advantage of the Lumatek’s design is that heat is distributed across the fixture rather than concentrated in one small area.
Lumatek recommends allowing the fixture to cool before handling it. My observations are based on the settings and conditions I’ve tested and shouldn’t be taken as a guarantee that the bars remain cool at full power or in warmer surroundings.
Is the Lumatek ATS 300W PRO Noisy?
No. The light uses passive cooling with no built-in fans, so it has been completely silent in my experience.
In my indoor hydroponic setup, any background noise comes from the Spider Farmer DWC air pump and my separate circulation fan rather than the Lumatek itself.
Overall, the construction and cooling have been highlights of my initial testing. The open bar design feels well suited to a 300W grow light, particularly when used in an enclosed grow tent where managing temperatures is important.
Lumatek ATS 300W PRO Electricity Consumption and Running Costs
One of the advantages of the Lumatek ATS 300W PRO is its adjustable power output. Although rated at 300W, the light can be dimmed to 25%, 50% or 75%, allowing you to reduce electricity consumption when full intensity isn’t needed. This is particularly useful when growing seedlings and young plants.
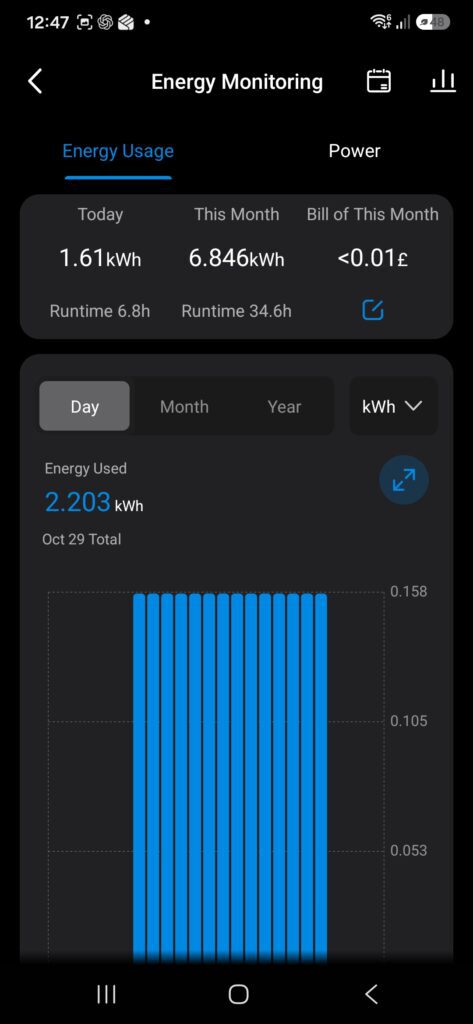
I’ve been measuring the light’s actual electricity consumption using an energy monitor. This has allowed me to check how closely the dimmer settings correspond to the expected power draw, rather than relying entirely on the manufacturer’s specifications.
My Measured Electricity Consumption
So far, I’ve tested the Lumatek at both 50% and 75% output. The results suggest that the dimmer settings correspond closely to the expected electricity consumption.
- 50% brightness: Approximately 155W, equivalent to 0.155kWh per hour.
- 75% brightness: Approximately 237W, equivalent to 0.237kWh per hour.
These results are close to what I’d expect from a 300W grow light at the respective dimmer settings. I haven’t yet measured the 25% and 100% settings separately, so I’ve used Lumatek’s published power figures for those settings in the running-cost comparison below.
How Much Does the Lumatek ATS 300W PRO Cost to Run?
The following table shows the estimated electricity costs at each brightness setting, assuming 14 hours of operation daily and an electricity price of 25p per kWh. Monthly costs are calculated over 30 days.
| Brightness | Power Draw | Daily Cost | Monthly Cost |
|---|---|---|---|
| 25% | 80W* | 28p | £8.40 |
| 50% | 155W | 54p | £16.28 |
| 75% | 237W | 83p | £24.89 |
| 100% | 307W* | £1.07 | £32.24 |
*The 25% and 100% power figures are taken from Lumatek’s published specifications, while the 50% and 75% figures are based on my own electricity measurements. Actual power consumption may vary slightly. Costs exclude other equipment, including heaters, fans and hydroponic pumps.
Is It Worth Running at Lower Power?
For my current setup, I’ve reduced the Lumatek to 50% brightness while my tomatoes, chillies, peppers and dwarf beans are still young. At approximately 155W, this costs around £16 per month when running for 14 hours daily, compared with nearly £25 at the 75% setting.
That’s a useful saving, particularly as seedlings don’t need the same light intensity as established fruiting plants. As the plants mature, I can increase the output without needing to change the light or my growing setup. Whether the additional electricity produces worthwhile improvements in growth and yield is something I’ll continue assessing.
If you’d like to see how the Lumatek compares with other LED grow lights, try my Grow Light Running Cost Calculator UK. You can enter different wattages, daily lighting hours and electricity rates to calculate and compare the running costs of different grow lights before buying.
Growing Performance: My Ongoing Vegetable Trial
I’m currently testing the Lumatek ATS 300W PRO by growing tomatoes, chillies, peppers and dwarf beans in my Spider Farmer four-bucket DWC hydroponic system. Having grown vegetables under other LED grow lights, I’m interested to see how the Lumatek performs as these plants develop.
My Initial Growing Conditions
I’ve initially positioned the light relatively high above the plants and experimented with different brightness settings. After running it at 75%, I’ve reduced the output to 50% while the seedlings establish themselves.
I’m also monitoring temperature and humidity inside the tent. The aim is to provide sufficient light without unnecessarily increasing electricity consumption or exposing young plants to excessive intensity.
Early Observations
It’s still too early to draw firm conclusions about growth rates or yields. I’ve also been adjusting the hydroponic system, particularly the irrigation arrangements and growing medium, which means any early differences in plant growth cannot be attributed solely to the light.
What I can say is that the Lumatek has been easy to adjust as growing conditions change. The separate dimmer allows me to increase or decrease output without moving the fixture, while the broad LED bar arrangement appears well suited to illuminating all four growing positions.
What I’ll Be Testing Next
As the plants mature, I’ll be assessing how well the Lumatek supports vegetative growth, flowering and fruit production. I’m particularly interested in whether running it at reduced power can provide worthwhile growth and yields without the electricity costs of using the full 300W.
I’ll update this section with photographs, growing results and any adjustments to hanging height, brightness and lighting duration as the trial progresses.
Testing update – November 2026: This is an ongoing hands-on growing trial rather than a completed harvest assessment. My conclusions so far relate primarily to the light’s construction, installation, cooling, dimming and electricity consumption.
Should You Buy the Lumatek ATS 300W PRO?
Based on my hands-on experience so far, I think the Lumatek ATS 300W PRO is an excellent choice for anyone looking to grow several plants indoors. The build quality is impressive, the aluminium bar design provides effective passive cooling, and the adjustable output makes it easy to adapt the light to different growing stages.
However, whether it’s the right choice depends largely on how many plants you want to grow and the growing area you need to cover.
In my own 90 × 90cm VIVOSUN grow tent, I’m using the Lumatek to illuminate four separate hydroponic growing positions. For this sort of arrangement, a 300W light makes sense. It offers enough potential output for established vegetables while allowing me to reduce the intensity when the plants are young.
If you’re only growing one or two small plants, however, the ATS 300W PRO may be more than you need. A smaller 100W or 150W LED grow light could be a more economical option, depending on the plants and the space they occupy. Although the Lumatek can be dimmed, you’d still be paying for lighting capacity you might never use.
At the other end of the scale, anyone growing across a substantially larger area may be better served by a more powerful fixture or multiple grow lights. The important consideration isn’t simply the number of plants, but the total canopy area and the amount of light they require as they mature.
My verdict: The Lumatek ATS 300W PRO is a well-built, versatile grow light that I’m very pleased with so far. Its silent operation, effective cooling and adjustable brightness settings are particular strengths. My vegetable-growing trial is still ongoing, but for a four-plant setup like mine, it’s a strong option worth considering.
If you’re unsure whether 300W is the right size for your growing space, take a look at my Best LED Grow Lights UK guide. It compares a range of grow lights at different power levels and price points, helping you choose something suited to your plants, growing area and budget.
Related Guides
If you’re comparing LED grow lights or planning your own indoor growing setup, these HomeGrower guides will help you choose the right lighting for your plants, growing space and budget:
- Grow Lights Explained – My complete guide to grow light wattage, spectrum, PPFD, hanging height and choosing suitable lighting for indoor plants.
- Best LED Grow Lights UK – Compare recommended LED grow lights, including models I’ve tested, to find the right power output and coverage for your growing space.
- Best Cheap Grow Lights UK – Explore affordable LED grow lights for seedlings, smaller growing areas and anyone who doesn’t need a full 300W fixture.