
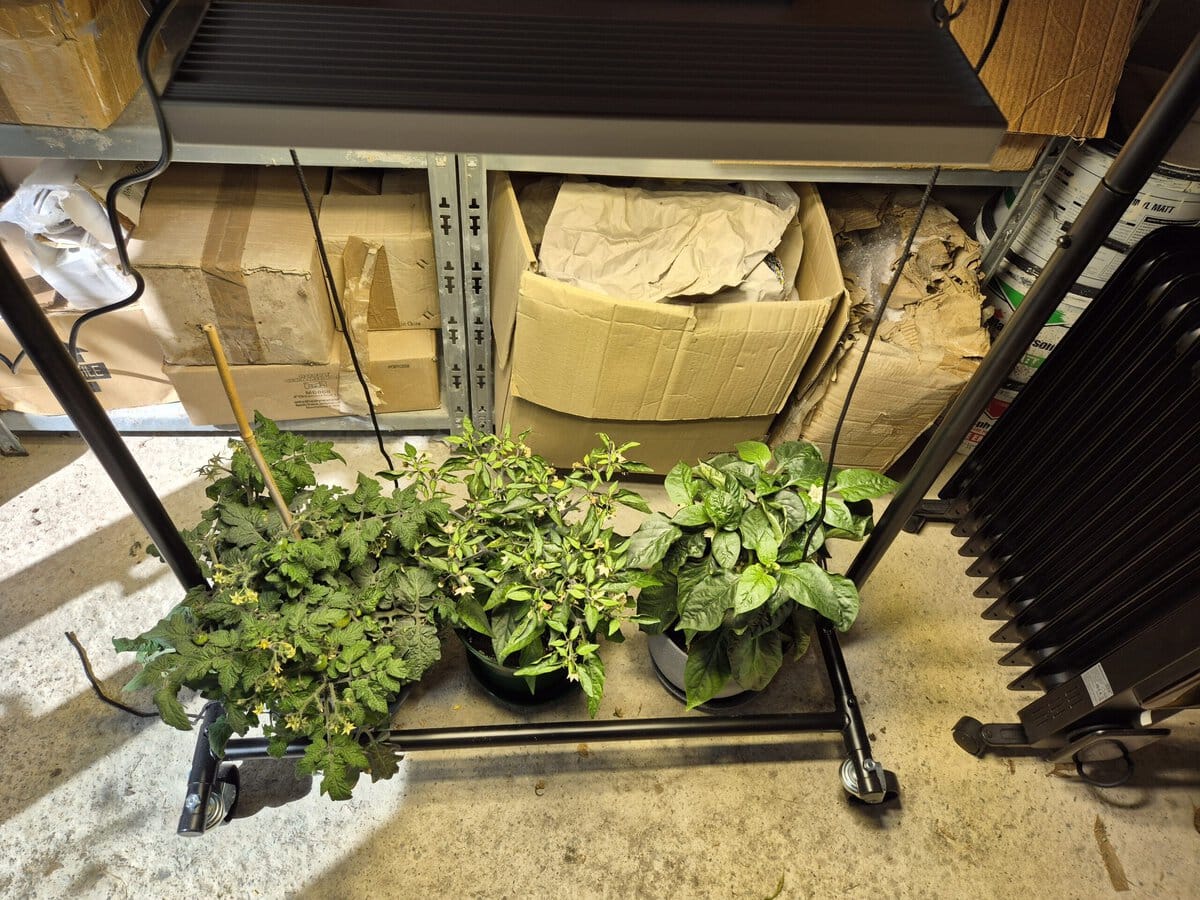
Setting up grow lights indoors doesn’t need to mean building a full grow room or buying lots of specialist equipment. For herbs, seedlings and small vegetable plants, a light, a stable support and a timer can be enough.
The important part is getting the basics right: placing the light above the plants, making the height easy to adjust, keeping water away from electrical connections, and giving plants enough space and airflow as they grow.
This guide covers the practical setup. If you’re new to grow lights and would like an overview, start with our Grow Lights Explained guide.
Alternatively, if you haven’t chosen a light yet and would like some recommendations, see our Best LED Grow Lights UK guide for the models we currently recommend.
What You’ll Need
A basic indoor grow-light setup normally needs:
- A suitable grow light
- A shelf, stand or other secure support
- Adjustable hangers if the light is suspended
- A plug-in timer or smart plug
- A tape measure
- Plant trays or saucers to catch water
Optional extras include a small fan, reflective surfaces and a light-meter app.
You don’t need a grow tent for a simple setup. Open shelving works well for seedlings, herbs and leafy greens.
However, if you would prefer to buy a complete all in one grow tent set up, then we cover these in our guide to the Best Grow Tent Setups.
Step 1: Choose Where the Light Will Go
Start with the space rather than the light.
Look for somewhere with a reasonably stable temperature, enough room above the plants for the fixture, and access to a plug socket without stretching extension leads across a walkway.
Try to avoid placing plants right next to a radiator or in a strong draught. A little airflow is useful, but a cold window or a fan blowing constantly can make conditions harder to control rather than easier.
It’s worth thinking ahead about watering too. Position plugs, smart plugs and extension sockets somewhere water isn’t likely to drip or spill.
If you’re growing on shelves, leave enough vertical space for both the light and the mature plant. A setup that’s perfect for a tray of seedlings can get cramped surprisingly quickly once the plants start putting on height.
Step 2: Mount the Light Above the Plants
For a simple shelf or stand setup, position the main grow light above the plants rather than off to one side.
How you support it depends on the fixture. LED panels are often suspended using rope ratchets or adjustable hangers, bar lights can be fixed underneath shelving, and grow-light bulbs may come with their own stand or need a suitable lamp fitting.
Adjustability matters more than almost anything else here.
Plants change height quickly, especially at the seedling stage, so being able to move the light a few centimetres without dismantling the whole setup makes it much easier to manage day to day.
Make sure the fitting is secure before putting plants underneath it, and keep cables supported rather than letting them hang into trays or wet growing areas.
Step 3: Set the Starting Height
There’s no single correct hanging height for every grow light.
A small bulb, a low-powered LED bar and a powerful panel can all need very different distances from the leaves.
Start with the manufacturer’s recommended hanging height where one is provided. Different grow lights vary too much for one distance to work across bulbs, bars and LED panels.
T5-style LED bars, for example, are generally used much closer to plants than a powerful panel light.
Rather than trying to remember one distance for every type of light, watch how the plants respond and adjust from there. Our Grow Light Distance Chart gives more useful starting distances for different types of lights.
Signs the light may be too far away include:
- Seedlings becoming tall and thin
- Plants leaning towards the light
- Weak or stretched growth
Signs it may be too close or too intense include:
- Bleaching
- Scorched-looking leaves
- Leaves curling away from the light
- Excessive heat around the canopy
A simple extra check with lights that give off noticeable heat is the hand test. Hold your hand at canopy height for a short while. If it feels uncomfortably warm, I’d move a young seedling further away.
The hand test only tells you about heat, though. A cool-running LED can still be too intense.
Step 4: Add a Timer
Once the physical setup is working, put the light on a timer rather than relying on yourself to switch it on and off every day.
Plants benefit from a consistent light and dark cycle, and there’s little benefit in switching the light manually when a basic timer can keep the schedule consistent.
A simple mechanical timer is enough for most setups.
I use a smart plug with scheduling and energy monitoring built in, mainly because it also shows me how much electricity the light is actually using. I cover that in more detail in my Tapo P110 smart plug review.
How many hours you need depends on what you’re growing and its stage of growth, so rather than repeating all the timings here, see our full guide on how long grow lights should be on.
Most plants benefit from a regular dark period, so there’s generally no reason to run grow lights 24 hours a day.
Step 5: Adjust as Plants Grow
Once plants start growing, the distance between the light and the leaves changes.
It sounds obvious, but it’s one of the easiest things to overlook once the setup is running.
Check the canopy regularly and either raise the light or lower the plants as needed.
On shelving, moving shorter plants onto an upturned tray or small stand can help keep several different-sized plants at a similar distance from the light.
Rotate trays occasionally too if plants at the edges are clearly getting less light than those in the middle.
A phone light-meter app can also help as a rough comparison tool. Apps such as Photone can be useful for comparing one position with another and spotting obvious differences across a shelf.
A phone isn’t a substitute for a proper PAR meter, but for a beginner setup it can still help you see whether one part of the growing area is receiving noticeably less light than another.
Step 6: Add Airflow if You Need It
You don’t necessarily need a fan for a handful of plants in an open room.
In a crowded shelving setup or an enclosed growing area, though, gentle airflow can help stop warm, stagnant air building up around the leaves.
If you add a fan, it doesn’t need to blast directly at the plants. Gentle air movement around the growing area is enough.
This becomes more useful as plants get larger and the canopy fills in.
Step 7: Keep the Electrical Setup Sensible
Grow lights combine electricity, hanging equipment and regularly watered plants, so it’s worth planning the electrical side properly.
Keep plugs and extension sockets above floor level and away from trays.
Where practical, leave a drip loop in cables so that water running down a cable can’t travel directly into a plug or socket.
Don’t overload extension leads, and check that timers and smart plugs are rated for the equipment connected to them.
Our Grow Light Safety guide covers the fuller electrical and fire-safety side of indoor growing.
Reflective Surfaces (Optional)
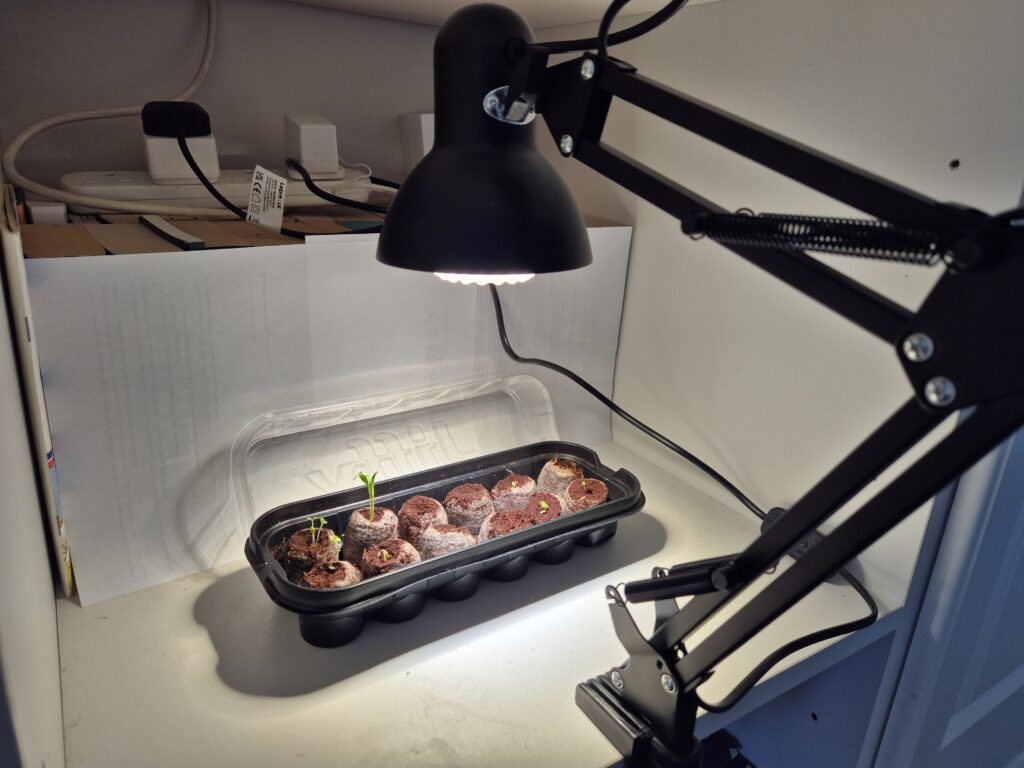
If a lot of light is spilling beyond the growing area, nearby white surfaces can help redirect some of it back towards the plants.
A white wall, white board or purpose-made reflective material is usually enough for a small setup.
Flat white surfaces are generally easier to use than crumpled foil because they spread reflected light more evenly.
A Simple Grow-Light Shelving Setup
For growing lots of small plants, shelving is one of the easiest arrangements to use.
A basic setup could include:
- A metal shelving unit such as the IKEA HYLLIS
- LED bars fitted beneath each shelf
- Seed trays or pots underneath
- One timer controlling the lights
- Waterproof trays to catch drips
Bar-style lights such as the Barrina T5 suit this kind of arrangement particularly well because they spread light across a long, shallow growing area rather than concentrating it in one spot.
Shelving also makes it easy to separate seedlings, herbs and other small crops without handing over a large area of the room to one grow light.
Before You Switch Everything On
Once the setup is assembled, check four things:
- Is the light securely supported?
- Can you adjust its height as the plants grow?
- Are the electrical connections protected from watering and spills?
- Is the light covering the plants reasonably evenly?
If the answer to all four is yes, you’ve got the foundations of a good indoor grow-light setup.
From there, distance, duration and intensity can be fine-tuned as needed rather than rebuilding the whole arrangement.
Final Thoughts
A good indoor grow-light setup doesn’t have to be complicated.
For most beginners, I’d focus on a secure, adjustable light above the plants, a timer, sensible cable management, and enough room to change the height as the plants grow.
Once those basics are in place, you can fine-tune distance and running time rather than constantly rebuilding the physical setup.
For independent horticultural guidance on artificial lighting, the RHS guide is also worth reading.
FAQs
Is shelving a good way to set up grow lights?
Yes. It works particularly well with LED bar lights because each shelf can become its own growing level. Just make sure there’s enough vertical space for the plants and enough room to adjust the light height as they grow.
Should a grow light be directly above the plants?
Usually, yes. For a simple setup, overhead positioning gives more even coverage and helps stop plants leaning strongly towards one side. Some supplementary lights can be positioned differently, but overhead is the simplest place to start.
How do I know if my grow-light setup needs adjusting?
Watch the new growth. Stretching and leaning can indicate that plants aren’t getting enough useful light, while bleaching, scorching or excessive heat can indicate that the light is too close or too intense. Check the distance regularly as plants grow rather than assuming the original setting will stay right.