

When you purchase through links on our site, we may earn an affiliate commission at no extra cost to you.
Top Picks
I’ve compared six polytunnels in this guide, covering everything from compact raised-bed tunnels to large walk-in models. These three are my standout choices for the most common uses, while the full comparison table below includes three additional options.
Best for Raised Beds
A compact and affordable option for protecting crops in raised beds, vegetable patches and smaller gardens without taking up the space of a full walk-in tunnel.
Best Overall Walk-In
A practical size for most gardens, giving you enough room to walk inside and grow tomatoes, peppers, cucumbers and other protected crops without needing a huge footprint.
Best for Large Gardens & Allotments
A much larger option for growers who want substantial covered space for several rows of crops, raised beds or longer-season allotment growing.
Worth knowing: Polytunnel prices and availability can change throughout the growing season. It is also worth budgeting for stronger anchors if your garden or allotment is exposed to wind, as secure installation can make a major difference to how well a tunnel copes with UK weather.
A good polytunnel can extend the UK growing season, protect crops from late frosts and give tomatoes, peppers, cucumbers and other warmth-loving plants a more reliable growing environment. They can also provide far more covered growing space than a greenhouse for the same budget.
I’ve compared six of the best polytunnels available in the UK, ranging from compact tunnels for raised beds to large walk-in models suitable for gardens and allotments. I’ve focused particularly on size, frame strength, cover quality, ventilation and value for money, as well as how suitable each design is for typical UK weather.
If you’re still deciding which type of structure would suit you best, see my greenhouse vs polytunnel guide for a comparison of the advantages and disadvantages of each.
How I chose these polytunnels: I have not personally tested every model in this guide. My recommendations are based on published specifications, build quality, size, ventilation, value and suitability for typical UK growing conditions, alongside my own experience using covered growing structures.
Best Polytunnels UK: 6 Top Options for Raised Beds, Gardens & Allotments


Best Polytunnels UK: Reviews
Below, I’ve looked at each of the six polytunnels in more detail, including their size, build quality, ventilation, likely strengths and the type of garden or grower they are best suited to.
There is quite a big difference between a compact grow tunnel and a full walk-in polytunnel, so the best option will depend mainly on the space you have available, how exposed your site is and how much growing room you actually need.
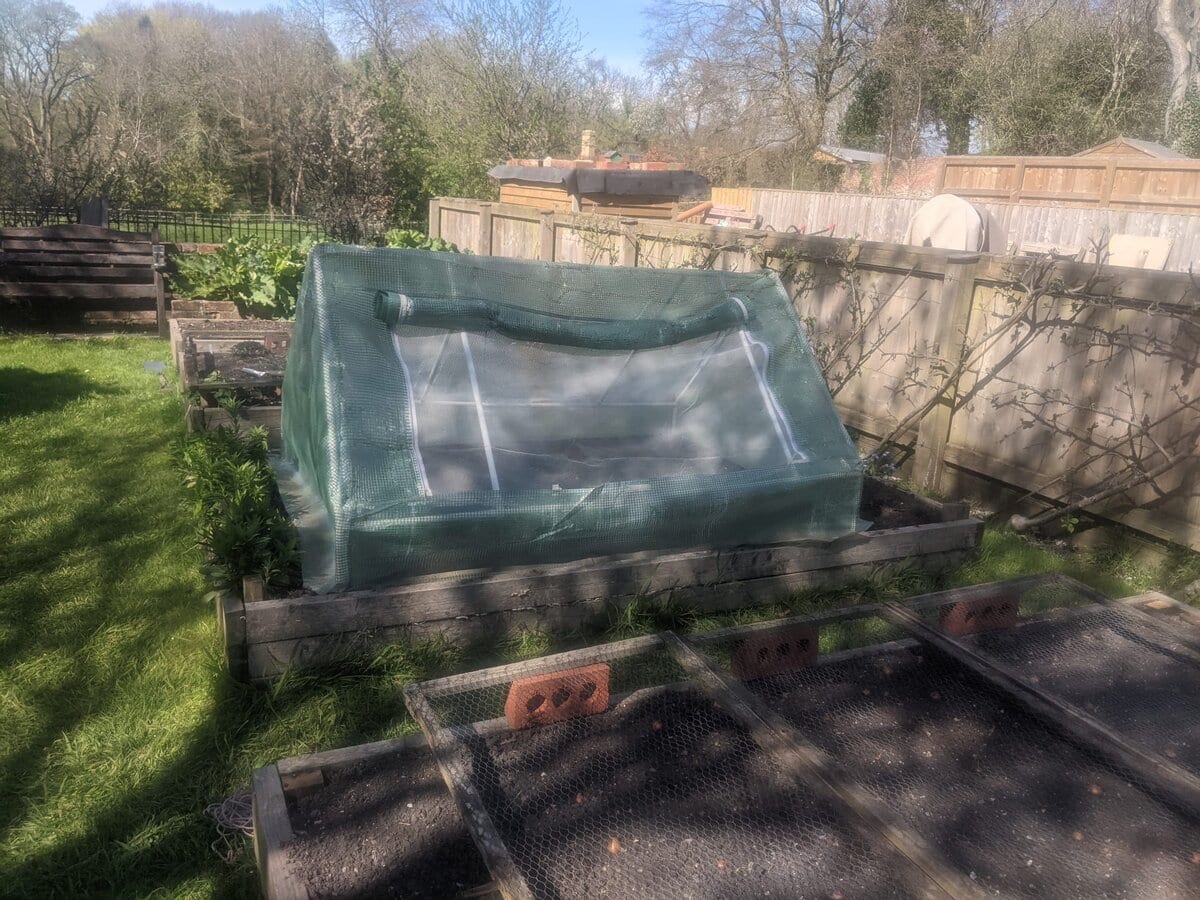
The Christow Large Garden Grow Tunnel is the option I would choose for raised beds, vegetable patches and smaller gardens where a full walk-in polytunnel would take up too much space. At around 2.7 m long, 0.92 m wide and 0.92 m high, it gives crops useful protection without dominating the garden.
It is particularly well suited to salad crops, strawberries, young vegetables and other plants that benefit from extra warmth and shelter early in the season. The low profile also makes it easier to position over an existing raised bed than a conventional walk-in tunnel.
Three Separate Growing Sections
One of the more useful features is the three-section design. Each section has its own zipped access, so you do not need to open the entire tunnel every time you want to water, harvest or check a particular part of the bed.
That also gives you more control over ventilation. On warmer days, individual sections can be opened while the rest of the tunnel remains protected.
Reinforced Cover and Steel Frame
The Christow uses a powder-coated steel frame with a reinforced polyethylene cover. The mesh reinforcement should give it better resistance to tearing than a very thin clear plastic cover, while still allowing plenty of light through for normal vegetable growing.
As with most lightweight garden tunnels, I would still make sure it is well secured in exposed weather. Its relatively low height helps compared with a full walk-in structure, but strong UK winds can still lift or move a tunnel that has not been anchored properly.
Best Used Over Raised Beds
This is where the Christow makes the most sense. Rather than competing with a full-size polytunnel, it is better thought of as a protective cover for an existing growing area.
It can help warm the soil earlier in spring, protect young plants from late cold spells and create a more sheltered environment for crops without requiring a permanent structure.
Who Is the Christow Grow Tunnel Best For?
I think the Christow is best for raised beds, compact gardens, vegetable patches and gardeners who want seasonal protection without installing a walk-in polytunnel.
If you want to stand inside the structure, grow tall crops such as tomatoes at full height or create several growing rows, I would move up to one of the walk-in models in this guide instead.
Verdict: The Christow Large Garden Grow Tunnel is a practical choice for protecting crops in raised beds and smaller growing spaces. Its three access sections make it more usable than a basic cloche, while the compact footprint makes it a good fit for gardens where a full-size polytunnel would be unnecessary.

The Outsunny 2 × 2.5 m Walk-In Polytunnel is the budget option I would consider if you want a proper walk-in growing space without spending much more than you would on a large garden cloche. At roughly 2.0 × 2.5 × 2.0 m, it provides enough room for several rows of crops while still fitting into a fairly modest garden.
Its biggest attraction is value. You get a full-height structure with a steel frame, PE cover, zipped entrance and ventilation windows for considerably less than many heavier-duty polytunnels.
A Useful First Walk-In Polytunnel
The jump from a low grow tunnel to a walk-in model changes how you can use the space. Instead of simply covering an existing bed, you can create paths, position pots or grow bags inside and grow taller crops such as tomatoes, cucumbers and peppers.
The size should work particularly well for gardeners who want meaningful protected growing space but do not have room for one of the 4 m or 6 m tunnels later in this guide.
Ventilation for Warmer Weather
Ventilation is important in any polytunnel because temperatures and humidity can rise quickly on sunny days. This Outsunny includes mesh-covered ventilation windows as well as a zipped entrance, giving you several ways to increase airflow when conditions warm up.
That is useful not only for controlling temperature but also for reducing the humid, stagnant conditions that can encourage fungal problems around closely spaced plants.
Budget Construction Means Anchoring Matters
The compromise is that this is still a relatively lightweight polytunnel. The steel frame and PE cover are perfectly reasonable for the price, but I would not treat it as a permanent structure that can simply be assembled and forgotten.
Good anchoring is particularly important. If possible, secure the frame properly and bury or firmly weigh down the lower edges of the cover rather than relying entirely on the fixings supplied. That matters even more if your garden is exposed to strong winds.
Who Is the Outsunny Walk-In Polytunnel Best For?
I think this Outsunny makes most sense for beginners, smaller gardens and anyone wanting an inexpensive first walk-in polytunnel. It offers substantially more usable growing space than a raised-bed tunnel without requiring the footprint or cost of a heavy-duty model.
If you live in a particularly exposed location or want something that will stay in place for many seasons, I would spend more on one of the stronger framed options further down this guide.
Verdict: The Outsunny 2 × 2.5 m Walk-In Polytunnel is a good-value route into full-height protected growing. Its size, ventilation and low price make it appealing for beginners, although careful anchoring is essential if you want it to cope well with typical UK weather.
The BIRCHTREE 3 × 2 m Polytunnel is the model I would choose for most gardens if you want a proper walk-in structure without moving up to a much larger allotment-sized tunnel. At around 3.0 × 2.0 × 2.0 m, it gives you useful growing space while remaining manageable to site and secure.
It sits in a very practical middle ground: larger and more usable than the budget Outsunny, but still compact enough for many domestic gardens. That makes it well suited to tomatoes, cucumbers, peppers, salad crops and other plants that benefit from a longer protected season.
A Sensible Size for Most Gardens
The 3 × 2 m footprint gives you enough room to create a central path with growing space on either side, or to use pots, grow bags and smaller raised beds inside.
It is also tall enough to stand and work comfortably, which makes a significant difference if you are watering, pruning or harvesting regularly through the season.
Galvanised Steel Frame
One of the main reasons I prefer this over many cheaper walk-in tunnels is the galvanised steel frame. It gives the structure a more substantial feel and should offer better resistance to corrosion than a basic painted frame.
That does not make it storm-proof, and I would still anchor it carefully, but the stronger frame is reassuring if you want a tunnel that will stay in regular use rather than simply act as a temporary seasonal cover.
Useful Ventilation and Access
The walk-in design gives you much more control over growing conditions than a low tunnel. Opening the main entrance and ventilation panels helps release excess heat and humidity during warmer weather, while the enclosed cover still provides protection when temperatures fall.
Good airflow is particularly important once tomatoes, cucumbers and other larger crops begin filling the space, as a crowded polytunnel can become hot and humid very quickly.
Who Is the BIRCHTREE 3 × 2 m Polytunnel Best For?
I think this model is best for typical UK gardens, keen vegetable growers and anyone who wants a versatile walk-in polytunnel without taking over a large part of the garden.
If your main priority is the lowest possible price, the smaller Outsunny is cheaper. If you want substantially more growing space for an allotment or large garden, the 6 × 3 m BIRCHTREE later in this guide is the more suitable option.
Verdict: The BIRCHTREE 3 × 2 m Polytunnel is one of the most balanced options in this guide. Its useful size, full-height access and galvanised frame make it a strong all-round choice for gardeners who want something more substantial than an entry-level tunnel without stepping up to a very large structure.
The Crocodile Trading 4 × 2 m Pro+ Polytunnel is the model I would look at if strength and stability matter more than simply buying the cheapest large tunnel. At around 4.0 × 2.0 × 2.0 m, it gives you plenty of usable growing space while still being narrow enough to fit into many larger gardens and allotment plots.
What separates it from more basic walk-in tunnels is the emphasis on reinforcement. The Pro+ design uses a galvanised steel frame, extra bracing and a reinforced cover, making it a more serious option for growers who want something sturdier than an entry-level seasonal structure.
Extra Bracing for Better Stability
The biggest advantage here is the additional structural support. Roof and diagonal bracing help reduce movement in the frame, which is particularly useful on larger tunnels where wind places more pressure on the structure.
No lightweight polytunnel should be treated as storm-proof, but this is the sort of construction I would favour over a basic frame if your garden or allotment is relatively exposed.
Useful 4 × 2 m Growing Space
The 4 × 2 m footprint gives you more flexibility than the smaller 3 × 2 m tunnels. There is enough room for a central path with substantial growing areas on either side, or for a mix of grow bags, pots and in-ground planting.
It also works well for taller crops such as tomatoes, cucumbers and climbing beans, while still leaving enough room to move around and manage plants through the season.
Reinforced Cover
The cover is another reason this model stands out. A heavier reinforced PE cover should resist tearing better than the very thin covers supplied with many budget tunnels, while still providing the warmth and shelter needed for protected growing.
As always, the lifespan of the cover will depend heavily on how tightly it is fitted and whether it is allowed to flap in strong wind. Proper installation matters just as much as the material itself.
Who Is the Crocodile Trading Pro+ Best For?
I think this model is best for keen growers, larger gardens and allotments where extra frame strength is worth paying for. It makes particular sense if you want a more substantial structure but do not need the full footprint of a 6 × 3 m tunnel.
If your site is sheltered and price is the main priority, a cheaper walk-in model may be enough. If maximum growing area matters more than reinforcement, one of the larger 4 × 3 m or 6 × 3 m options below will give you more space for the money.
Verdict: The Crocodile Trading 4 × 2 m Pro+ is one of the stronger options in this guide. Its extra bracing, galvanised frame and reinforced cover make it a good choice for growers who are willing to pay a little more for better stability and durability.
The VOUNOT 4 × 3 × 2 m Polytunnel is the option I would consider if you want noticeably more growing space than a standard 3 × 2 m tunnel without moving all the way up to a very large 6 m structure. With around 12 m² of covered space, it gives you plenty of room for several crop rows, pots, grow bags or raised beds.
That extra width and length make it much more flexible for serious home growing. You can separate different crops more easily, maintain clearer paths and still have enough headroom for taller plants such as tomatoes and cucumbers.
More Space for Serious Growing
The main attraction is the footprint. At 4.0 × 3.0 × 2.0 m, this is large enough to feel like a proper growing area rather than simply a protective cover over a few plants.
For gardeners who want to grow a mixture of tomatoes, peppers, cucumbers, salad crops and seedlings at the same time, the additional floor space gives you much more flexibility than the smaller walk-in models.
Multiple Doors and Ventilation Panels
Good airflow becomes increasingly important as polytunnels get larger, and this VOUNOT includes multiple doors and side ventilation openings to help release excess heat and humidity.
Being able to open more than one section is useful on warm summer days, when a large enclosed tunnel can heat up surprisingly quickly. It also makes access easier when you are moving compost, trays or larger plants in and out.
Good Value for the Amount of Space
One of the strongest arguments for this model is the amount of covered growing area you get for the money. A 12 m² tunnel gives you considerably more usable space than most domestic greenhouses at a similar price point.
The trade-off is that this is still a relatively lightweight structure compared with a permanent greenhouse or a specialist commercial polytunnel, so careful anchoring and assembly remain important.
Who Is the VOUNOT 4 × 3 m Polytunnel Best For?
I think this model is best for larger gardens, keen vegetable growers and anyone who wants enough protected space to grow several crop types at once.
If you only need a tunnel for a few tomato plants or a single raised bed, it is probably larger than necessary. If you are growing on an allotment or want the maximum possible covered space, the 6 × 3 m BIRCHTREE below is the more suitable choice.
Verdict: The VOUNOT 4 × 3 m Polytunnel is a strong option for growers who want a substantial increase in protected growing space without going to an extra-large tunnel. Its 12 m² footprint and useful ventilation make it particularly appealing for larger gardens and more ambitious vegetable growing.
The BIRCHTREE 6 × 3 m Polytunnel is the largest model in this guide and the one I would consider if maximum growing space is the priority. At around 6.0 × 3.0 × 2.0 m, it provides approximately 18 m² of covered area, making it particularly well suited to allotments and large gardens.
That makes it a very different proposition from the smaller garden tunnels. Rather than protecting one bed or a handful of plants, this size gives you enough room for several crop rows, internal paths and a much wider mix of vegetables through the season.
Large 18 m² Growing Area
The main advantage is simply the amount of usable space. An 18 m² footprint gives you room for tomatoes, cucumbers, peppers, salad crops, seedlings and other vegetables at the same time without everything becoming overcrowded.
It also gives you much more flexibility over layout. You could use traditional soil beds, grow bags, pots or smaller raised beds inside while still keeping enough room to move around comfortably.
25 mm Galvanised Steel Frame
The larger BIRCHTREE uses a 25 mm galvanised steel frame, which is a useful step up from the thinner tubing found on many smaller budget polytunnels. On a structure this size, that extra frame diameter is particularly important because the large cover creates considerably more surface area for the wind to push against.
The galvanised finish should also provide better corrosion resistance than a basic painted steel frame, which is useful if the tunnel is going to remain outside throughout the year.
Best When Space Is the Priority
This model makes most sense on an allotment or larger garden where you can genuinely use the extra growing area. It gives you enough room to grow several crop types at once rather than dedicating most of the tunnel to tomatoes or one main crop.
However, I would distinguish between a large allotment and an exposed allotment. If your plot is relatively sheltered and you want the most growing space, the BIRCHTREE 6 × 3 m is the better choice. On a particularly windy or exposed site, I would favour the smaller Crocodile Trading Pro+ because its additional roof and corner bracing make frame strength the higher priority.
Anchoring Is Especially Important at This Size
A 6 m polytunnel needs to be installed carefully. I would not rely solely on lightweight supplied pegs on an exposed plot. Make sure both the frame and lower edges of the cover are securely fixed, and keep the cover properly tensioned so that it cannot repeatedly flap in strong wind.
This is not a weakness unique to the BIRCHTREE; it is simply one of the compromises that comes with choosing a very large lightweight polytunnel rather than a much more expensive specialist structure.
Who Is the BIRCHTREE 6 × 3 m Polytunnel Best For?
The BIRCHTREE is best for allotments, large gardens and growers who want the maximum amount of protected growing space for the money. Its 18 m² footprint provides substantially more room than the smaller tunnels in this guide.
If you have an average-sized garden, the 3 × 2 m BIRCHTREE will be easier to accommodate. If your main concern is coping with an exposed location rather than maximising space, I would choose the more heavily braced Crocodile Trading Pro+ instead.
Verdict: The BIRCHTREE 6 × 3 m Polytunnel is my choice when growing space is the priority. Its 18 m² footprint and 25 mm galvanised frame make it particularly attractive for larger gardens and allotments, but on very exposed sites I would sacrifice some space and choose a more heavily braced structure instead.
How to Choose a Polytunnel
The right polytunnel depends less on finding the biggest model you can fit and more on matching the structure to your garden, crops and exposure to wind. A small tunnel can be ideal for a raised bed, while a larger walk-in model makes more sense if you want to grow several crops through a full season.
Choose the Right Size
For raised beds and compact vegetable plots, a low tunnel such as the Christow can provide useful protection without taking over the garden. If you want to stand inside, grow taller crops and create permanent growing rows, I would move up to a walk-in model of around 3 × 2 m.
Larger 4 × 3 m and 6 × 3 m polytunnels provide considerably more flexibility, but they also catch more wind and require more careful anchoring. I would only choose one of these if you are confident you will use the extra space.
Pay Attention to the Frame
Frame construction becomes increasingly important as a polytunnel gets larger. Lightweight steel frames can work perfectly well in sheltered gardens, but thicker galvanised tubing, ground bars and additional roof or diagonal bracing are worth looking for if you want a more substantial structure.
A stronger frame does not make a polytunnel storm-proof, but it can reduce flexing and movement when the weather deteriorates.
Check the Cover Quality
Most garden polytunnels use reinforced polyethylene covers. These are inexpensive, relatively easy to replace and generally suitable for home growing.
Heavier reinforced covers should resist tearing better, although installation matters just as much as thickness. A loose cover that repeatedly flaps in the wind will usually wear much faster than one that has been fitted tightly and securely.
Think About Access and Ventilation
On smaller tunnels, zipped access panels may be enough. With larger walk-in structures, I prefer models with several mesh ventilation windows and, ideally, doors that can be opened at both ends or from more than one position.
This makes temperature and humidity much easier to control in summer and also improves access when moving compost, pots and plants in and out.
Do Polytunnels Need Ventilation?
Yes. Good ventilation is one of the most important parts of managing a polytunnel. Even on a relatively mild UK day, temperatures can rise quickly inside a closed tunnel when the sun comes out.
Opening doors and ventilation panels allows excess heat and moisture to escape. This is particularly important around tomatoes, cucumbers and other dense crops, where poor airflow can encourage fungal problems.
In warmer weather, I would usually open the tunnel early rather than waiting until it has already become very hot. Mesh-covered windows are useful because they improve airflow while still providing some protection from larger pests.
What Is the Best Polytunnel for a Windy Site?
If your garden or allotment is exposed, I would prioritise frame strength and anchoring over sheer size. Larger tunnels create more surface area for the wind to push against, so a cheap 6 m structure can actually be a worse choice than a smaller but better-supported model.
Look for galvanised steel tubing, ground bars and additional roof or diagonal bracing. Of the models in this guide, the Crocodile Trading Pro+ stands out because of its extra structural support.
Positioning also matters. A hedge, fence or building can provide useful shelter, although I would avoid placing a tunnel directly beneath large trees where falling branches could damage the cover.
How Should I Anchor a Polytunnel?
The pegs supplied with budget polytunnels are often only suitable for basic installation. If your site gets regular wind, I would reinforce the structure rather than relying on them alone.
Depending on the design, useful options include stronger ground anchors, screw-in anchors, fixing the frame to timber, or burying the lower edge of the cover in a shallow trench. Burying or firmly weighting the cover skirt also helps stop wind getting underneath it.
Whatever method you use, the aim is to secure both the frame and the cover. A strong frame will not help much if wind can get underneath a loose cover and turn the entire structure into a sail.
Where Should You Position a Polytunnel?
Choose a position that receives plenty of light but is reasonably sheltered from the strongest prevailing winds. Avoid low spots where water regularly collects, as permanently wet ground can make paths unpleasant and can also weaken anchoring.
Leave enough space around the outside to inspect the cover and make repairs. It is tempting to squeeze a tunnel tightly against a fence or wall, but being able to reach all sides makes maintenance much easier.
If you are still deciding whether a tunnel or greenhouse would work better in your garden, see my greenhouse vs polytunnel comparison.
Final Thoughts
The best polytunnel is not necessarily the largest or most expensive one. For raised beds, a compact grow tunnel may provide all the protection you need, while a 3 × 2 m walk-in polytunnel is likely to be the most practical size for many UK gardens.
If you have more space, larger 4 m and 6 m models can provide a substantial protected growing area for vegetables, seedlings and longer-season crops. Whatever size you choose, I would pay particular attention to anchoring, frame strength and ventilation, as these make a big difference to how well a polytunnel performs in UK conditions.
For more advice on protected growing, visit my greenhouses and polytunnels guide.
Related Articles
- Greenhouse vs Polytunnel: Which Is Right for Your UK Garden?
- Best Mini Greenhouses UK
- Greenhouses and Polytunnels Guide
Polytunnel FAQs
What size polytunnel is best for a small garden?
For most small UK gardens, a 3 × 2 m walk-in polytunnel is a good balance between usable growing space and footprint. If you only want to protect a raised bed or vegetable patch, a low grow tunnel such as the Christow will usually be more practical.
What is the best polytunnel for a windy garden or exposed allotment?
For exposed sites, I would prioritise frame strength and bracing over maximum size. A smaller, better-supported tunnel can be a safer choice than a very large lightweight model.
Of the models in this guide, the Crocodile Trading Pro+ is the one I would favour for a windier site because of its stronger frame and additional bracing. The larger BIRCHTREE 6 × 3 m is better when growing space is the main priority and the site is reasonably sheltered.
Do polytunnels need to be anchored?
Yes. Even relatively small polytunnels can catch the wind, so both the frame and cover should be secured properly. Stronger ground anchors, buried cover edges or fixing the frame to timber can all improve stability.
I would be especially careful with larger 4 m and 6 m tunnels, as their greater surface area gives the wind more to push against.
Can you leave a polytunnel up all year?
Yes, many polytunnels are left in place throughout the year, but winter weather is when frame strength and anchoring matter most. A well-secured walk-in tunnel can remain useful through winter, while very lightweight seasonal structures may be better dismantled or have their covers removed in particularly exposed locations.
Do polytunnels get too hot in summer?
They can. Temperatures can rise quickly inside a closed polytunnel on sunny days, so doors and ventilation panels should be opened regularly during warm weather.
Good airflow also helps reduce excess humidity, which can otherwise encourage fungal problems around closely spaced crops.
Why is there condensation inside my polytunnel?
Condensation forms when warm, moist air inside the tunnel meets the cooler cover. It is normal, particularly overnight and early in the morning.
Increasing ventilation is usually the best way to reduce it. Opening doors or vents during the day allows damp air to escape before moisture builds up inside.
Can I put a polytunnel on a slope?
A gentle slope is usually manageable, but the frame will be easier to assemble and anchor if the footprint is reasonably level. On steeper or uneven ground, creating a flatter base can improve both stability and drainage.
Do I need planning permission for a polytunnel in the UK?
Small domestic polytunnels are often straightforward to install, but planning requirements can depend on the size, position and location of the structure. Larger tunnels may need more consideration, particularly in restricted or protected areas.
Allotment sites can also have their own rules on the size, type and position of polytunnels, so it is worth checking with your local council, landlord or allotment association before installing a large structure.
What can I grow in a polytunnel in the UK?
Polytunnels are particularly useful for tomatoes, cucumbers, peppers, chillies, salads, herbs and seedlings. They can also extend the season for many vegetables by providing extra warmth and protection from wind and frost.