
A mini greenhouse is one of the simplest ways to get ahead in the growing season — especially in the UK, where spring weather can still be unpredictable.
This is particularly true in April, when the sun feels warm during the day but the ground is still cold and nights can drop close to freezing. A mini greenhouse isn’t just a bonus at this time of year — it’s what keeps early seedlings alive and actually growing.
Used properly, it warms the soil, protects young plants from wind and pests, and gives you a clear head start compared to open beds.
In this guide, I’ll show you exactly how to set up a mini greenhouse using a simple tunnel-style frame over a raised bed — the same type many UK gardeners use at home.
If you’re still deciding which one to buy, see our guide to the best mini greenhouses in the UK, or for a full overview of different setups, read the HomeGrower Guide to Greenhouses and Polytunnels.
💡 Quick Answer
A mini greenhouse (or low polytunnel) works like a simple tent for your plants — trapping warmth while protecting them from wind and pests.
To set one up:
- Lay out the poles and connectors first so you can see how it fits together
- Build the frame either in position or nearby — it’s light and easy to move once assembled
- Push the legs securely into the soil
- Pull the cover over the frame and anchor it tightly
- Open it on warmer days to prevent overheating and reduce damp
- Check soil regularly, as it will dry out faster than open ground
Step 1 – Lay Out the Parts
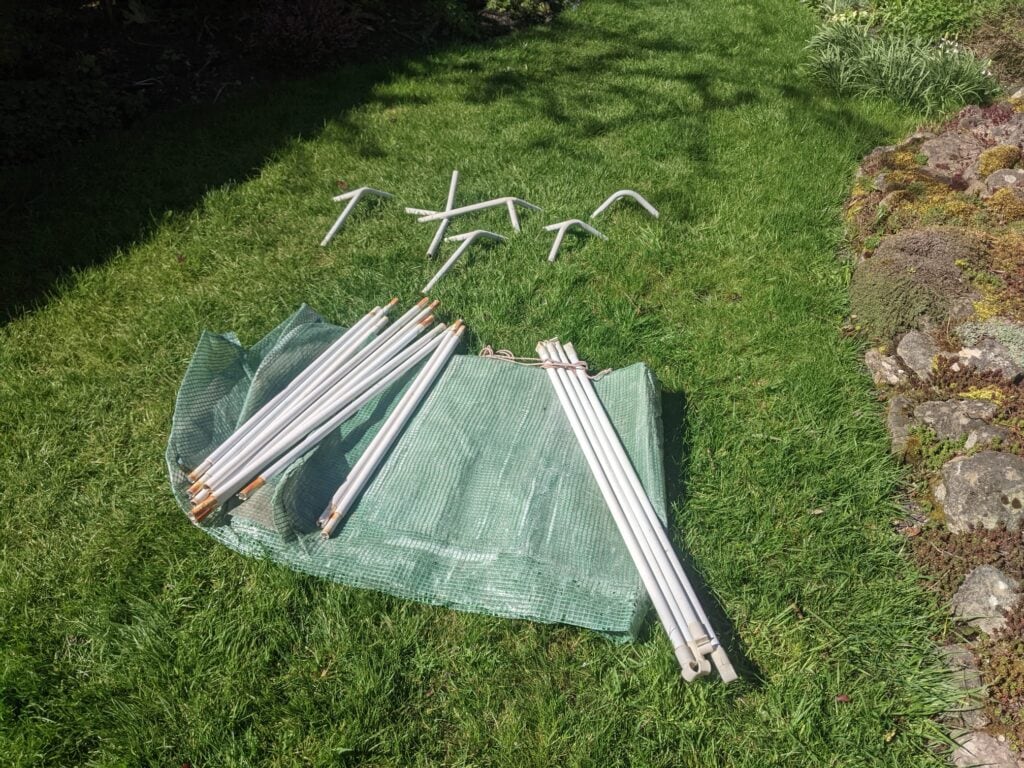
Laying out all the parts first makes it much easier to see how the mini greenhouse frame fits together.
Start by laying out all the parts of your mini greenhouse kit.
Most tunnel-style kits include:
- Straight poles
- Curved or angled connectors
- A mesh or plastic cover
It’s worth checking everything before you begin so you’re not trying to figure it out mid-build.
Step 2 – Assemble the Frame
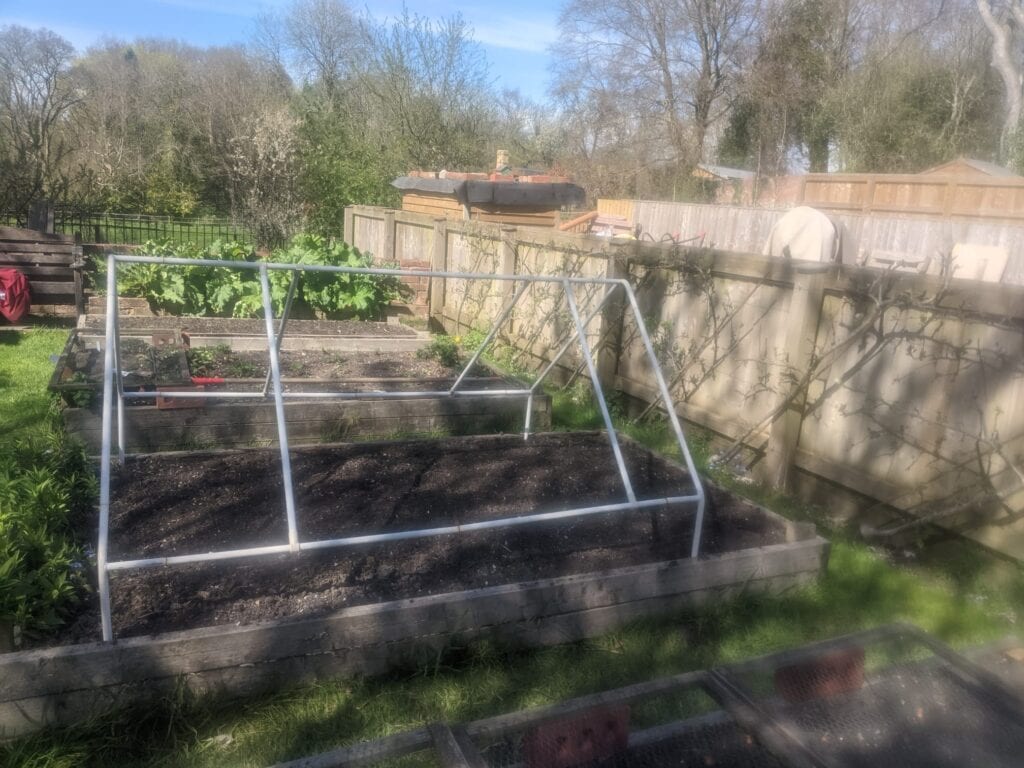
Once the frame is assembled, check it’s stable and evenly spaced before adding the cover.
Push the frame poles into the soil where you plan to position the mini greenhouse.
- Keep spacing even on both sides
- Make sure each side mirrors the other
- Aim for a stable, symmetrical shape
You don’t need to overthink it — just keep the structure balanced and firm in the ground.
Pro tip: If your soil is light or recently turned, don’t just push the poles in shallow. Wind can lift the whole structure surprisingly easily. Aim for at least 15–20cm depth. If you’re using a raised bed (like this setup), you can also secure the frame to the wooden sides for extra stability.
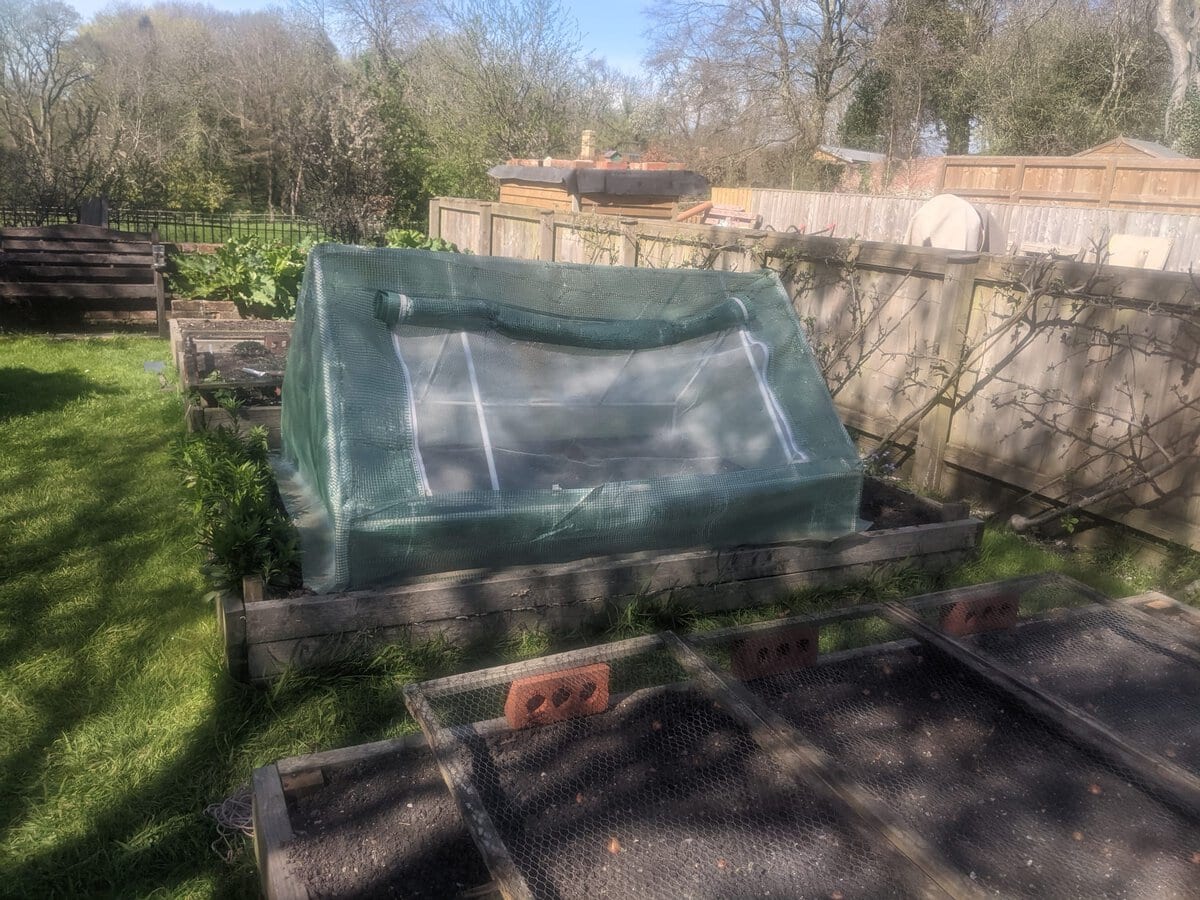
Step 3 – Add the Cover

Once the cover is fitted and secured, the mini greenhouse is ready to start protecting your plants.
Once the frame is built, drape the cover over the structure.
Make sure to:
- Pull it tight so it doesn’t sag
- Secure the edges with soil, pegs, or bricks
- Leave access for opening and closing
A loose cover isn’t just less effective — it causes problems. Sagging sections collect rainwater, and after a heavy downpour that weight can snap connectors on lighter frames.
🌱 How to Use a Mini Greenhouse
Mini greenhouses work well in most setups — directly on the ground, over containers, or on a raised bed like the one shown here.
They create a warmer, more protected environment by trapping heat and shielding plants from wind, rain, and pests.
On raised beds, they tend to be especially effective because the soil warms up faster. But even on open ground, you’ll still see earlier growth compared to uncovered plants.
In early spring, this can give you a 1–3 week head start — often the difference between slow seedlings and strong early growth.
For more detail, see our guide to using a greenhouse effectively.
🌡️ Ventilation (Most Common Mistake)
Mini greenhouses heat up quickly — even on mild days.
As a rule:
- Open it during the day if temperatures rise above ~12–15°C
- Close it again in the late afternoon
Ventilation isn’t just about heat — it’s about moisture too. If you see condensation building up inside, that damp environment can lead to seedlings rotting at the base.
Even on cooler days, opening it for 10–15 minutes helps refresh the air and keep plants healthy.
For more detail, see our Greenhouse Ventilation Guide.
💧 Watering
Soil inside a mini greenhouse dries out faster than you might expect.
Check moisture regularly, especially:
- On sunny days
- After ventilation has been open
It’s normal to need slightly more frequent watering than in open beds.
🌿 What to Grow in a Mini Greenhouse (UK)
Mini greenhouses are ideal for:
- Lettuce
- Spinach
- Radish
- Spring onions
- Beetroot
- Early carrots
They’re also useful for:
- Starting seedlings
- Hardening off plants before moving outdoors
For timing, see our Greenhouse Calender guide.
⚠️ Common Mistakes to Avoid
Not securing the cover properly
→ Wind can lift and damage it quickly
Forgetting ventilation
→ Leads to overheating and disease
Letting soil dry out
→ Happens faster than expected
Expecting it to behave like a full greenhouse
→ It’s a boost, not a complete growing system
🌿 Final Thoughts
A mini greenhouse is one of the easiest and most affordable ways to improve early-season results.
Most tunnel-style kits use standard pole sizes, which makes them easy to repair or adapt if anything breaks.
It doesn’t need to be complicated — just a simple frame, a well-fitted cover, and a bit of attention to ventilation and watering.
Used properly, it can make a noticeable difference to how quickly and reliably your crops get started.
For further guidance, see the RHS guide to choosing a greenhouse.
🔗 Related Articles
- Greenhouses & Polytunnels – Explore our main greenhouse guide, including different types, sizes, and how to choose the right setup.
- Best Mini Greenhouses UK – Compare the best mini greenhouses for small gardens, patios, balconies, and raised beds.