
Leaving indoor plants unattended during a UK summer is more stressful than it sounds.
Warm spells, long daylight hours, and the way UK homes trap heat mean pots can dry out far faster than expected — especially on windowsills or near grow lights. “Just water them well before you go” only really works for a few days. After that, you’re guessing.
Before a recent trip, I needed a proper solution. I was away for 22 days, couldn’t realistically ask someone to water my plants, and didn’t want to come home to dried-out or dead pots.
This is a real-world test of an indoor drip irrigation system — what worked, what didn’t, and what I’d do differently next time.
If you’re new to indoor growing or want a broader overview of how light, heat, watering, and space all work together, see my Complete Guide to Indoor Growing in the UK.
The problem indoor plant owners run into before holidays
Most of my plants were in typical UK indoor conditions:
- A mix of medium and larger pots
- Some on bright windowsills
- Some in warmer rooms where soil dries quickly
During summer, indoor plants often need watering every few days. Leave them unattended for three weeks and you’re relying entirely on luck.
Why I chose indoor drip irrigation over quick fixes
I’ve tried the usual options before:
- Asking someone to “pop in” (often missed days or uneven watering)
- Water spikes or upside-down bottles (inconsistent at best)
- Trays of water (fine short-term, unreliable over weeks)
What I wanted was controlled, repeatable watering that didn’t depend on someone else remembering — or guessing how much water a plant needs.
That’s what led me to automatic indoor drip irrigation.
The indoor drip irrigation system I used
I used a compact automatic indoor drip irrigation kit designed to water multiple houseplants from a single container.
I didn’t choose it for flashy features. I chose it because it suited a UK flat:
- Runs from a bucket or container (no plumbing)
- Individual drippers per pot
- Fully adjustable watering time and interval
- Small, quiet, and easy to hide indoors
This isn’t a miracle system — it’s just a reliable way to deliver small amounts of water consistently.
Affiliate disclosure: This article contains affiliate links. If you buy through them, HomeGrower may earn a small commission at no extra cost to you. As an Amazon Associate, HomeGrower earns from qualifying purchases.

How the setup works (simple, indoor-friendly)
Setup was straightforward:
- Fill a bucket or container with water
- Hang the device on the edge, with its weighted inlet sitting in the water
- Run the supplied tubing from the unit
- Cut tubing to length with normal scissors
- Use tee connectors to branch off to different pots
- Push drippers into the soil surface
If you have large plants mixed with smaller ones, you can add extra drippers into larger pots so they receive more water. That flexibility is important and works well.
Overall, this was very manageable in an indoor UK setup.
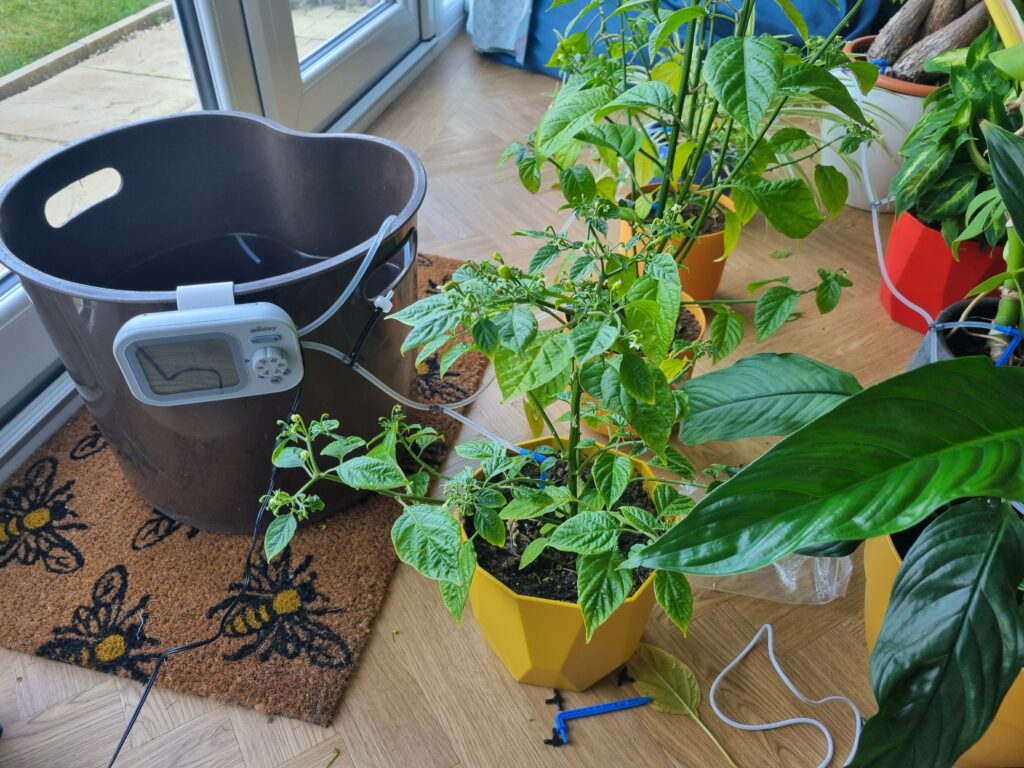
The irrigation unit simply hangs over the side of a bucket, drawing water up and distributing it to each pot via drip lines.
⚠️ Pro tip: container height, anti-siphon devices, and why placement still matters
Many indoor drip irrigation kits (including the one I used) are pump-based and include an anti-siphon component, which helps prevent uncontrolled flow when the pump is off.
That said, container placement still matters — especially over long periods.
In my setup, the water inlet was weighted and sat at the bottom of the bucket, drawing water from below pot level, and the system was designed to interrupt siphoning. This greatly reduces the risk of gravity-driven overwatering.
However, even with anti-siphon protection in place, it’s still best to keep the water container roughly level with your pots. Small height differences, residual water in the tubing, and how individual drippers sit in the soil can subtly affect how much water each plant receives over time.
This isn’t a fault with the system — it’s just the reality of moving water slowly and repeatedly indoors. Getting the container height sensible helps keep watering consistent, especially when you’re away for weeks rather than days.
The mistake I made before leaving
Here’s the honest part.
I set this system up on the morning I left.
I only had time for a short test, watching a single watering cycle and doing a quick visual check of how much water was dripping out. Based on that, I made a judgement call.
My settings:
- Watering every 3 days
- 6 minutes per cycle
The system worked exactly as programmed — but I didn’t give myself time to properly observe soil moisture over multiple cycles. That was the risk.
What happened during the 22 days I was away
I was away for 22 days, covering a typical UK summer period with warm spells and long daylight hours.
Once I left, the system ran unattended. No adjustments, no intervention.
Like anyone would, I had moments mid-trip wondering whether I’d overdone it — or underdone it — but there was nothing to do except wait and see.
Coming home: what worked and what didn’t
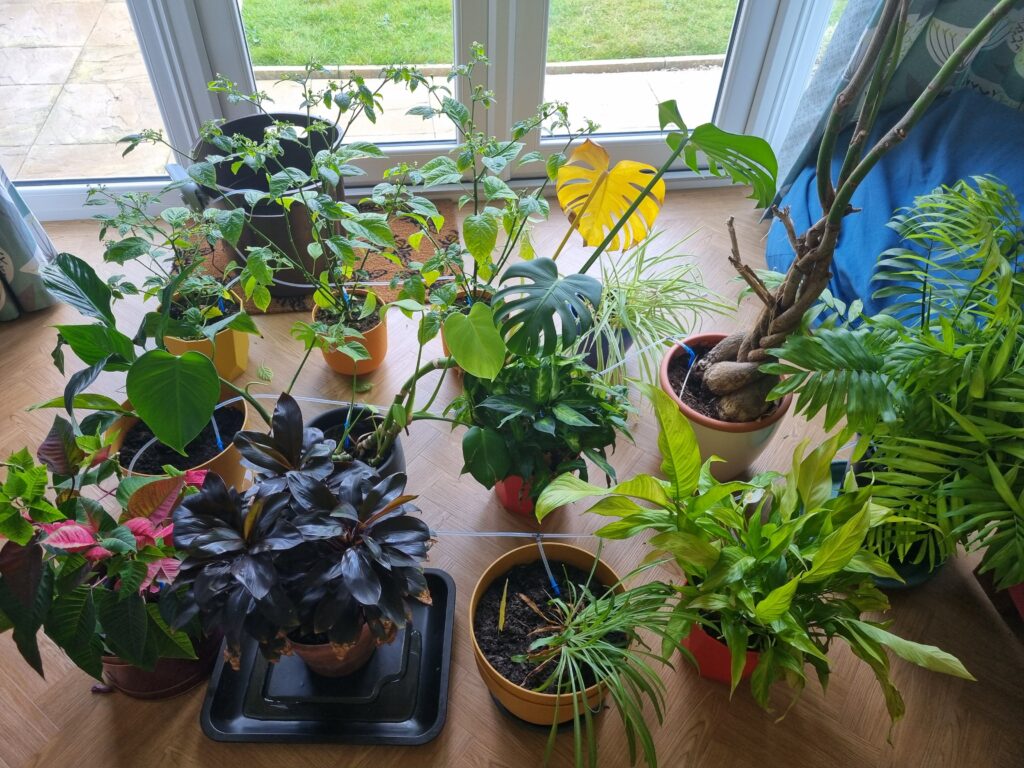
When I got home, the result was reassuring.
All but one plant had survived and looked healthy.
The one that didn’t make it was a poinsettia — one of those red Christmas plants that often struggle indoors long-term anyway. That pot appeared to have been overwatered, and poinsettias are particularly sensitive to consistently damp soil.
Given that, I’m not convinced the irrigation system was really at fault.
Lessons learned (at a glance)
Here’s a simple summary of how different plants responded to the same watering schedule:
| Plant type | Result | Why |
|---|---|---|
| Large leafy plants | ✅ Success | Bigger root systems handled the 3-day cycle well |
| Smaller window plants | ✅ Success | Stayed hydrated despite summer sun |
| Poinsettia | ❌ Failed | Dislikes “wet feet”; likely overwatered |
Everything else showed no signs of stress.
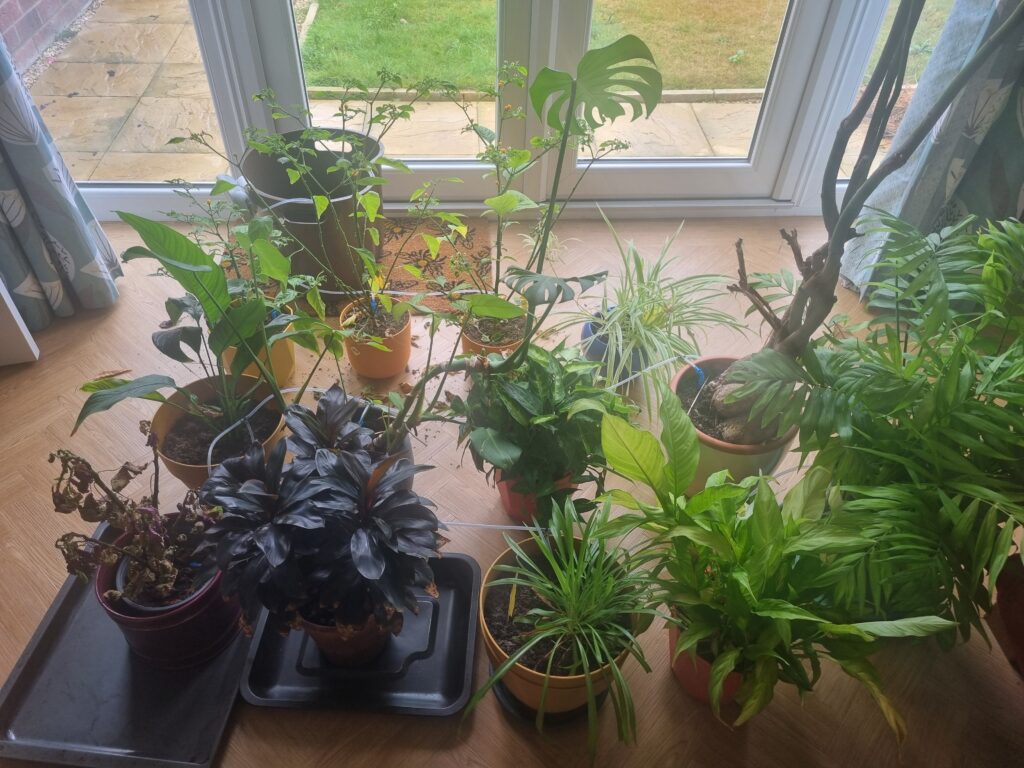
The plants on my return after 22 days away — all survived except a poinsettia (bottom left), which is known to dislike consistently damp soil.
A note on UK summer conditions
UK summers are unpredictable. One week it’s cool and overcast — the next, indoor temperatures spike unexpectedly.
An indoor drip irrigation system acts as insurance against those sudden heat surges that can turn a living room into a greenhouse while you’re away.
What I’d do differently next time
Next time, I’d change one thing:
I’d run the system for at least 1–2 weeks before travelling.
That trial period lets you:
- Fine-tune watering duration
- Adjust intervals accurately
- Balance drippers per pot
- Spot overwatering early
I’d also exclude plants like poinsettias that dislike consistently moist soil. Those are better watered manually.
Who indoor drip irrigation is (and isn’t) for
Good fit if:
- You have multiple indoor plants
- You’ll be away for more than a few days
- You live in a flat or indoor-only setup
- You want consistency, not guesswork
Probably unnecessary if:
- You’re only away for a weekend
- You have one or two hardy plants
- You don’t want to test or adjust settings
Final thoughts
This wasn’t about finding the “best” product — it was about reducing risk while I was away.
With proper testing beforehand, indoor drip irrigation is a practical, low-stress way to keep houseplants alive during summer trips in UK homes.
It’s not glamorous. It’s not perfect.
But it kept my plants alive for 22 days — and that’s exactly what I needed.